Home

Showing posts with label Acrylic Paint. Show all posts

Sunday, November 18, 2012

Rhinestone Polka Dot Nails

Fact: eBay and I have become very good friends over the past few years and over that time I have amassed quite a large collection of great nail art supplies. Rhinestones (1mm, 2mm, 3mm - round, square, heart, star - glitters in hex, round, micro and bead, etc etc...) are one of my favourite ways to jazz up a manicure yet I seldom use them. Today, I remeded that.

I'm really happy to share with you my actual NOTD. That practically never happens, so without further ado, please take a peek!


Base Colour: Sally Hansen (Extreme Wear) - Grey Area, 2 coats
Dots: Acrylic paint in blue and purple (brand is Decora from Dollarama)
Gems: 1mm round blue, 2mm hot pink square
Topcoat: Seche Vite

What do you think of my bedazzled manicure? I definitely dig it.

Friday, June 8, 2012

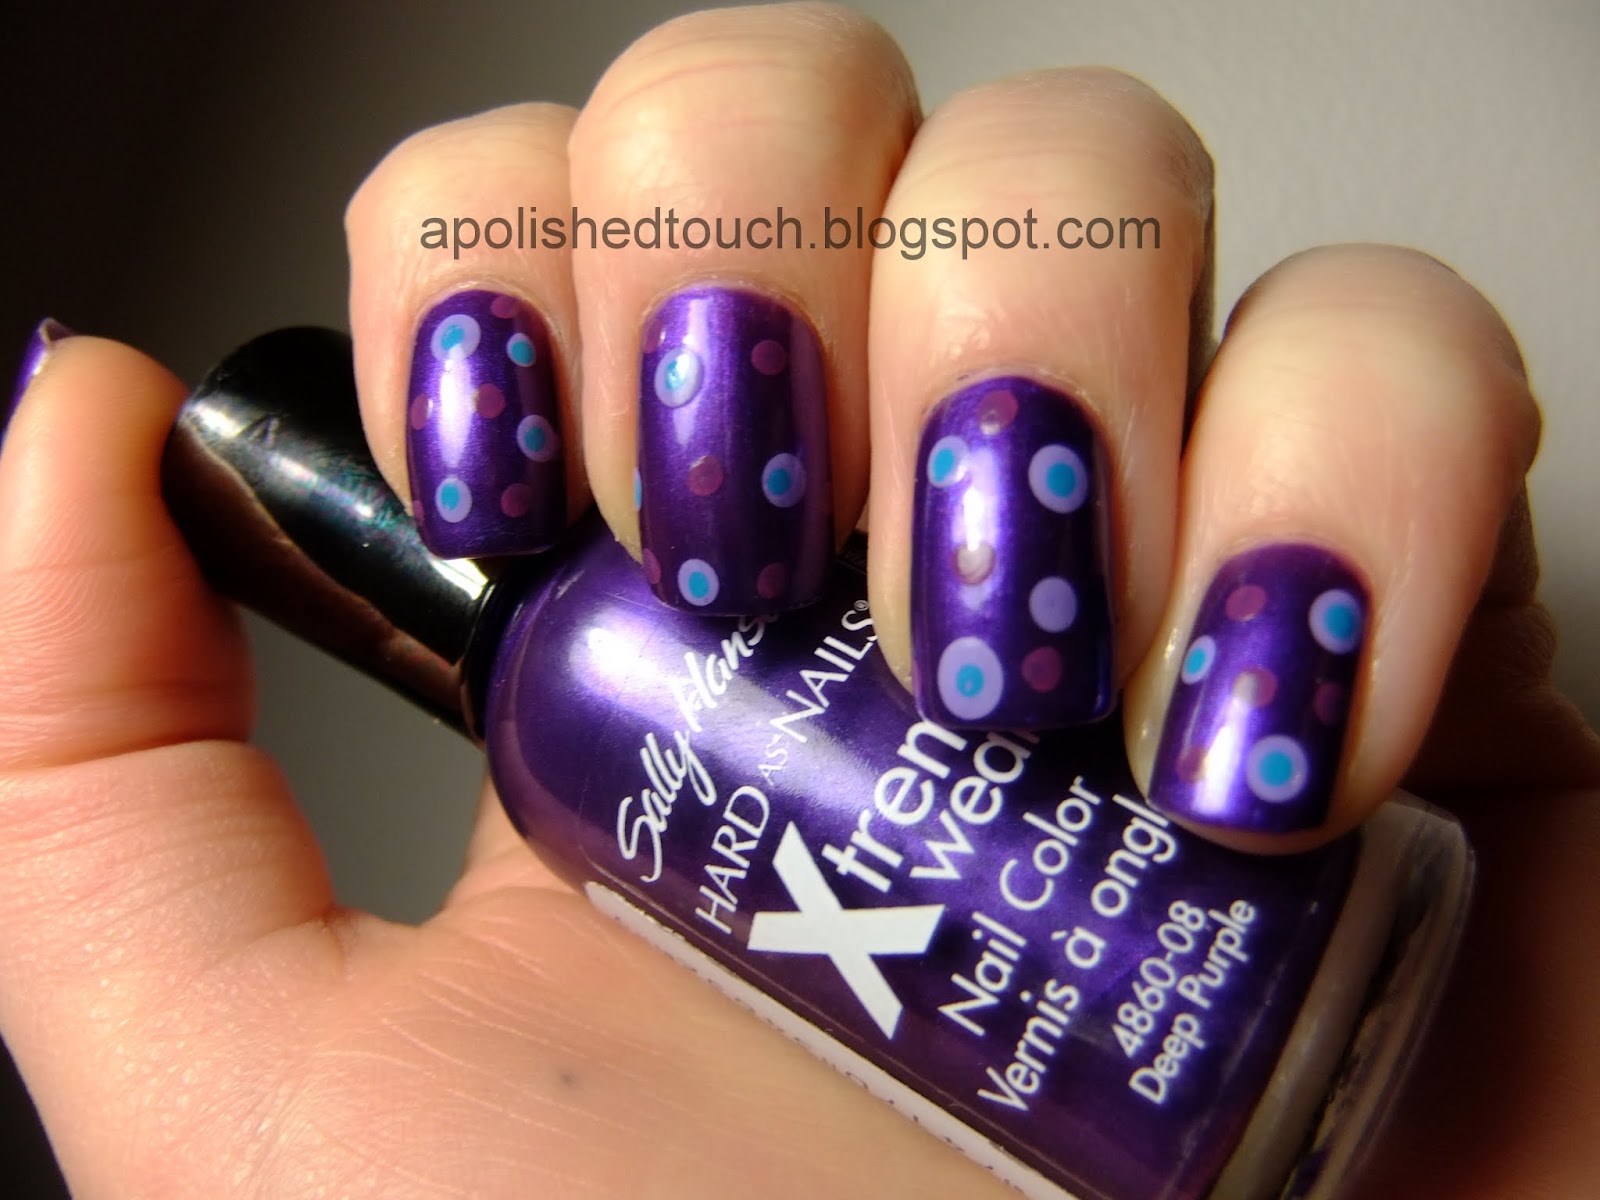
Sally Hansen Deep Purple Gets Dotty

I love my Twitter account! If you haven't followed me (I follow back!) please do. I'm excited to get to know everyone a bit better. :) Pintrest is fun although very addicting. I have to be careful when going on there. LOL.

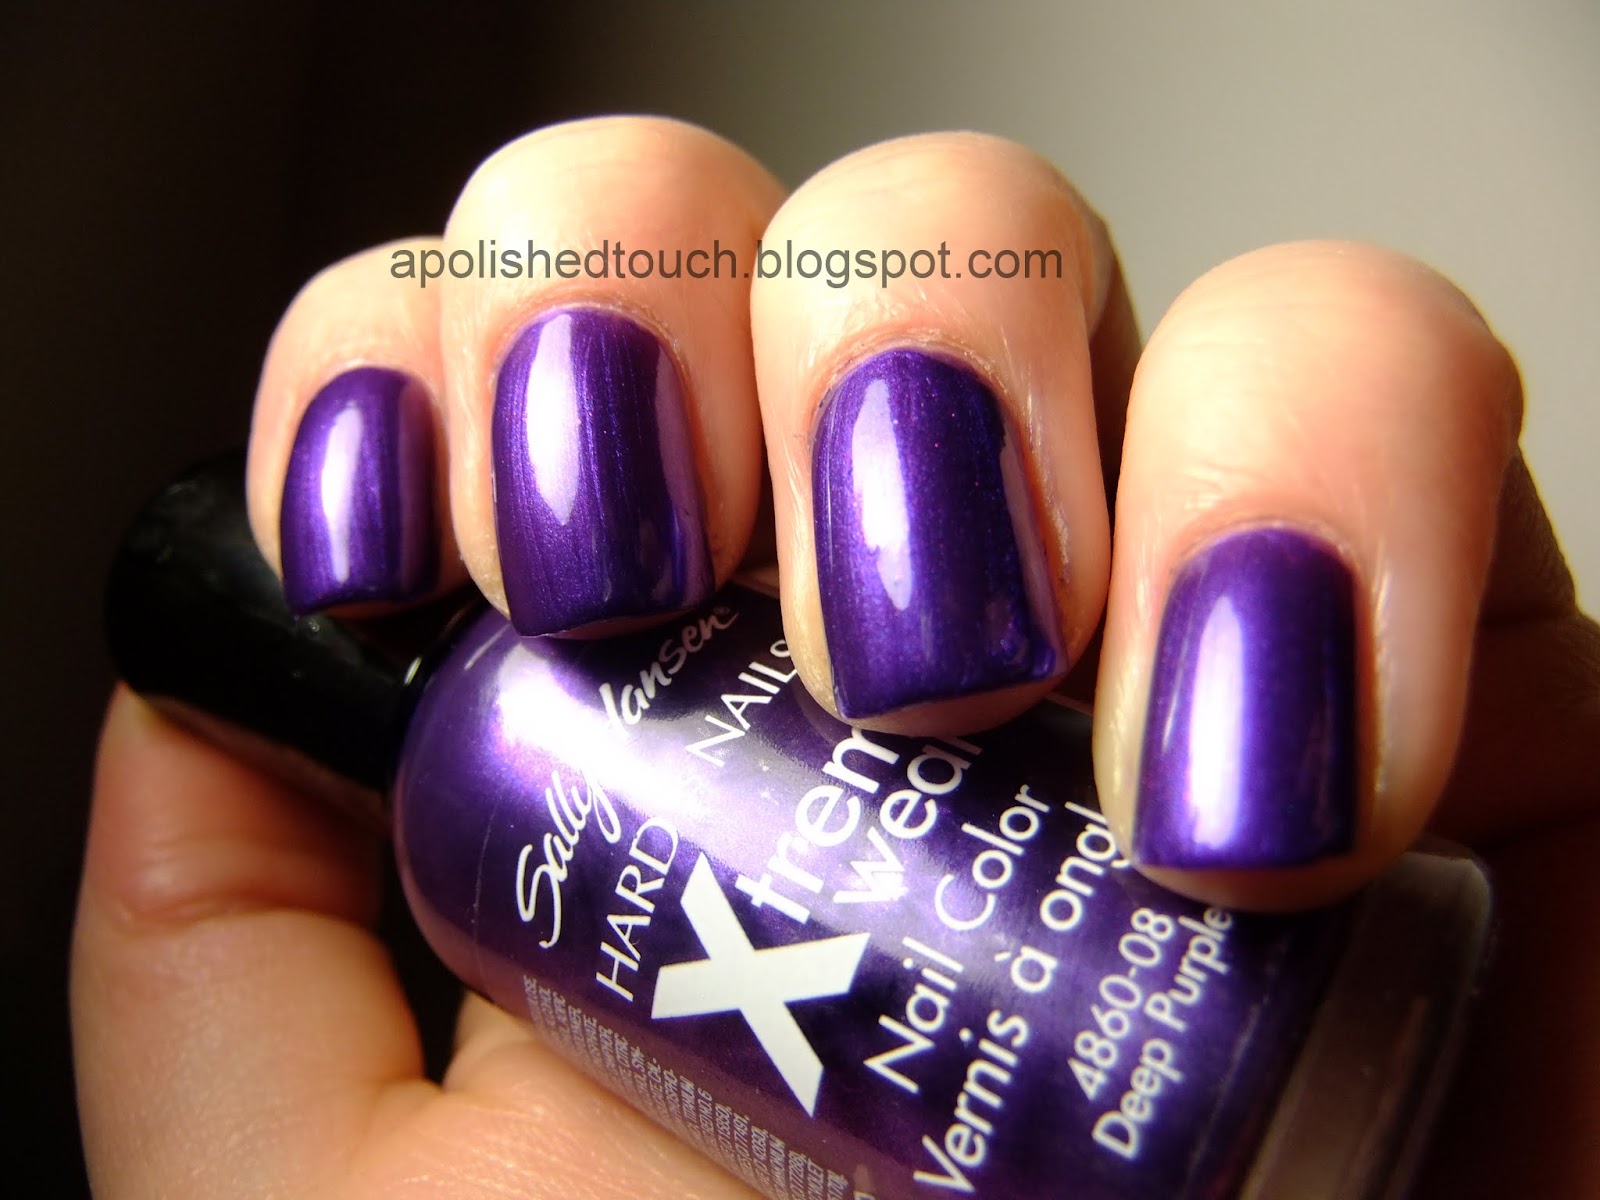
Sally Hansen "Deep Purple" - 3 coats

Deep Purple is gorgeous. It is a very obvious purple with a very fine shimmer throughout. At some angles you can see blue hiding in around the edges. This isn't visible in the bottle but I noticed it while I was wearing it and you can sort of see what I'm talking about in the first two photo's.

Application was a little thin - I needed 3 coats for opacity - but easy to control. I sway between being a 2-coater and a 3-coater. Three coats just looks sooo good, but at the same time, I'm not always patient enough or there is a lack of time. I resolve to be more patient. Nothing I can do about being in a time crunch. Life happens.

The polka dots ... meeeeeh. I'm very blasé about them. Dotting inside of dots is so cute and I've seen many successful mani's doing this, but my colour choices were poor. I should have used polish rather than my acrylic paints. Ah well. Looking back on the photo's now, I realize I didn't have topcoat on for any of the photo's either, just a general FYI.

Enjoy your Friday!
- A Polished Touch

Sunday, May 29, 2011

First Leopard Print Mani

I'm back with a new look that I created last Sunday. I wanted to try out the leopard print that everyone has been showcasing lately. I will admit that I really dislike how it turned out but it was definitely a learning process.

Base colour: L.A Colors "Mega Watt" - 3 coats
Spots: OPI "Brisbane Bronze"
Outline: Black Water-Based Acrylic Paint

My mother-in-law said it looked like I had "measles".
Grrrreat ... haha, I do love her, I promise.
Lesson learned? 
1.) Make irregular shapes for the spots instead of using a dotting tool and making perfect circles.
2.) Do NOT use acrylic paint to outline, use black nail polish. 

I found that the acrylic paint wasn't going on opaque enough for my liking and was leaving bald spots. Needless to say this manicure lasted a total of 3 minutes - just long enough for me to snap a couple pictures. I firmly believe in showing both good & not-so-good mani's so that way we all can learn something. :)

I have a lot of different colour combinations and ideas for future leopard print looks in the future. Stay tuned!

Thanks for reading.

Tuesday, May 10, 2011

Belated Mother's Day Flower Design

I'd like to wish a belated 'Happy Mother's Day' to all the Moms who might happen across this post. I created a look especially with my Mom in mind.
Base Colour is 4 coats of Revlon 'Lilac Pastelle' 185
The flower detailing was created using water based acrylic paints purchased at any craft store

Her favourite colour is purple and we used to have toll-painted candlestick holders that I remember vividly so I decided to combine the two. I started with a pale, pastel lilac colour for my base. I then took my dotting tool and using the smaller end I used pink water-based acrylic paint and made a small dot in the upper corner of my nails. I flipped my dotting tool over and using the large end created the four white dots (water-based acrylic paint again but in white). Then I took a small detailing brush and created the petals using a light green. For added effect I went back in using a dark green and created a 'shadow' on the petal. If you click on the image you can see this in greater detail.

I wore this look for two days before changing it up. My nail polish collection seems to be steadily growing and I am always so excited to try new looks out, hence the short lifespan of my designs. At least they are 'immortalized' here. Haha.

Thanks for reading.

Monday, March 28, 2011

When Life Gives You Lemons

Last night my manicure died. More specifically, my thumb nail. Just as I was headed to bed I nicked my nail against the desk and with horror (melodramatic, I know) I saw that the nail couldn't be salvaged. I went to bed upset having thought it would last a full week. (I did this look on Friday, March 25th, 2011.)

This morning I removed the polish from my nail and sat waiting until inspiration hit. A few days ago I purchased quite a bit of supplies (polishes, glitters, nail tools, etc) and decided I would try a new look out but only on my thumb. Below is the look I created. I will be re-polishing it with my purple/silver diagonal design from my first blog post.

When life gives you lemons - make lemonade, or in my case, a new nail design! (If only temporarily.) Enjoy!


Starting with a clear base coat I free handed the white tip french manicure. I then added a blue/green sparkle polish to the tip. Blue acrylic paint was used for the polka pots, with light blue craft glitter overlapping them. I finished with a generous topcoat to keep the glitters in place.


Thanks for reading!